Evil Crawling Things Supplies and Armor Guide
Set up your supplies in the lobby so you can stun a Crawler, heal after a hit, or switch back to a loaded gun during a round. Check your Heavy Vest before the round starts so you know how much armor you have left.
Select a supply in your hotbar to see its remaining count in the lower-right corner. Switch items when the count hits zero or you see an Out of message. Use a MedKit when injured to spend one kit and restore health. To equip armor, select an owned Heavy Vest in SHOP → GEAR and press WEAR. It blocks 75% of incoming damage while worn with armor remaining. If it breaks, buy a replacement between rounds and press WEAR again.
Prepare supplies and check the HUD
In the lobby, open SHOP → GEAR, select a supply you own, and press the number for an available hotbar slot. Keep a gun in another slot so you have something to switch back to. Vests use the dedicated VEST SLOT, leaving your numbered slots open for weapons and supplies.
During the round, select a supply in the hotbar and read the remaining quantity in the lower-right HUD. If your hotbar is full, choosing an occupied slot replaces the item there. See how to move items and restore your hotbar setup.
Ammo Pack and reserve ammunition
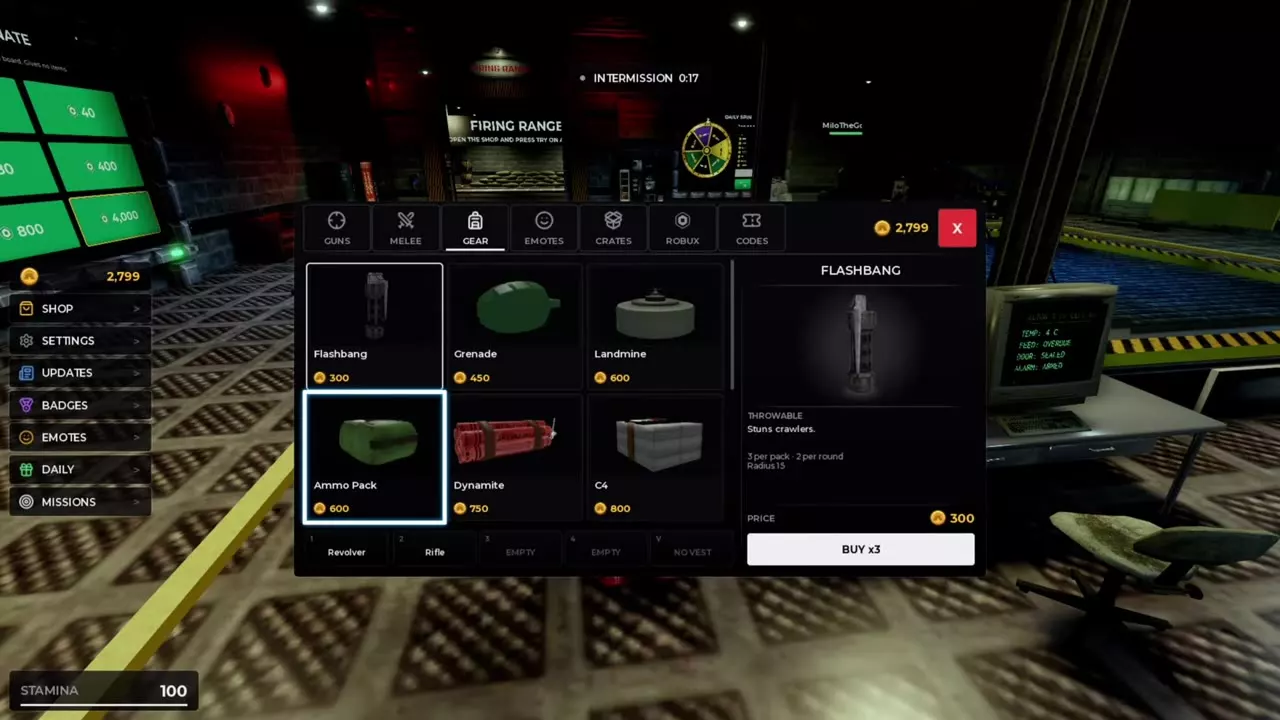
The Ammo Pack is an ammunition supply item that costs 600 Coins. Find it in SHOP → GEAR, below the Flashbang in the item grid.
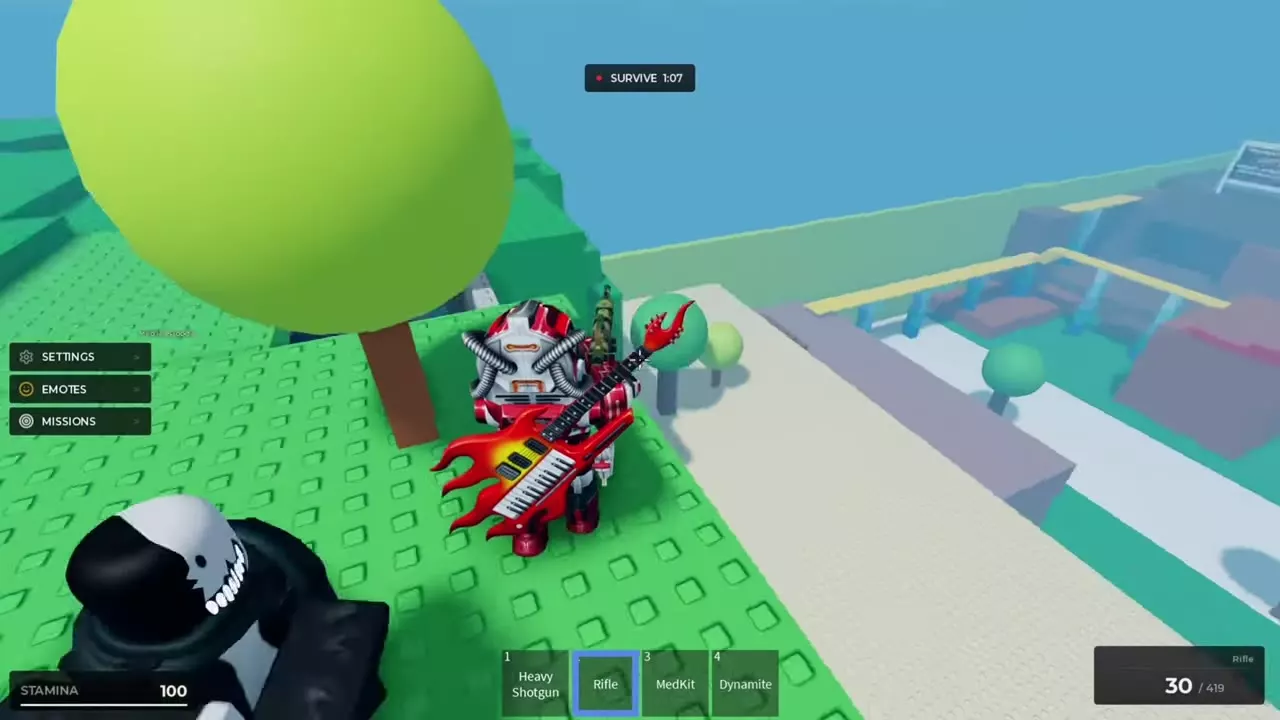
Select your gun and read the two ammo numbers in the lower-right HUD. The first is the number of rounds loaded. The second is the reserve you draw from when reloading. For example, reloading a Rifle from 24/425 to 30/419 moves six rounds from the reserve into the magazine. Check the second number to see how much ammunition you still have for subsequent reloads.
Flashbang stock and stun use
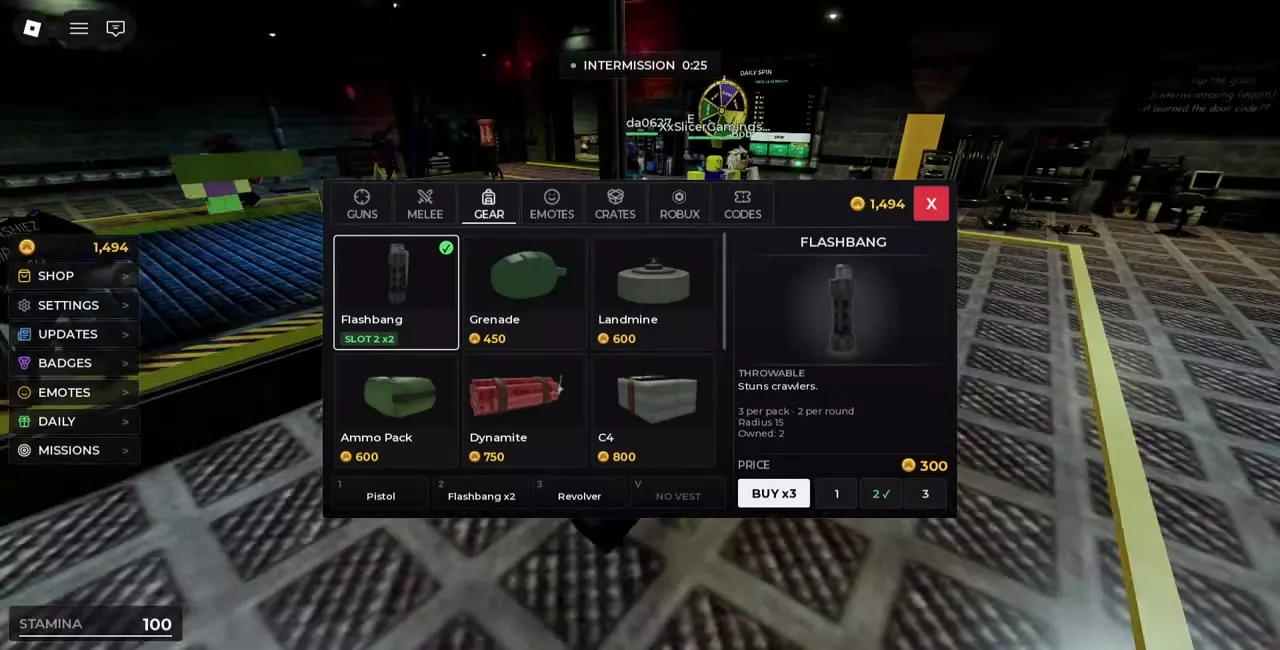
In GEAR, select Flashbang and press BUY x3 to get three for 300 Coins. You can use up to two Flashbangs per round.
- Assign the Flashbang to an available numbered slot, then select that slot during SURVIVE.
- Throw one when a Crawler is within the blast’s stun radius of 15. Use the opening to get through an exit or switch back to your gun and resume firing.
- Check the remaining count after the throw. If it reaches zero or you see Out of Flashbang, switch to another equipped item.
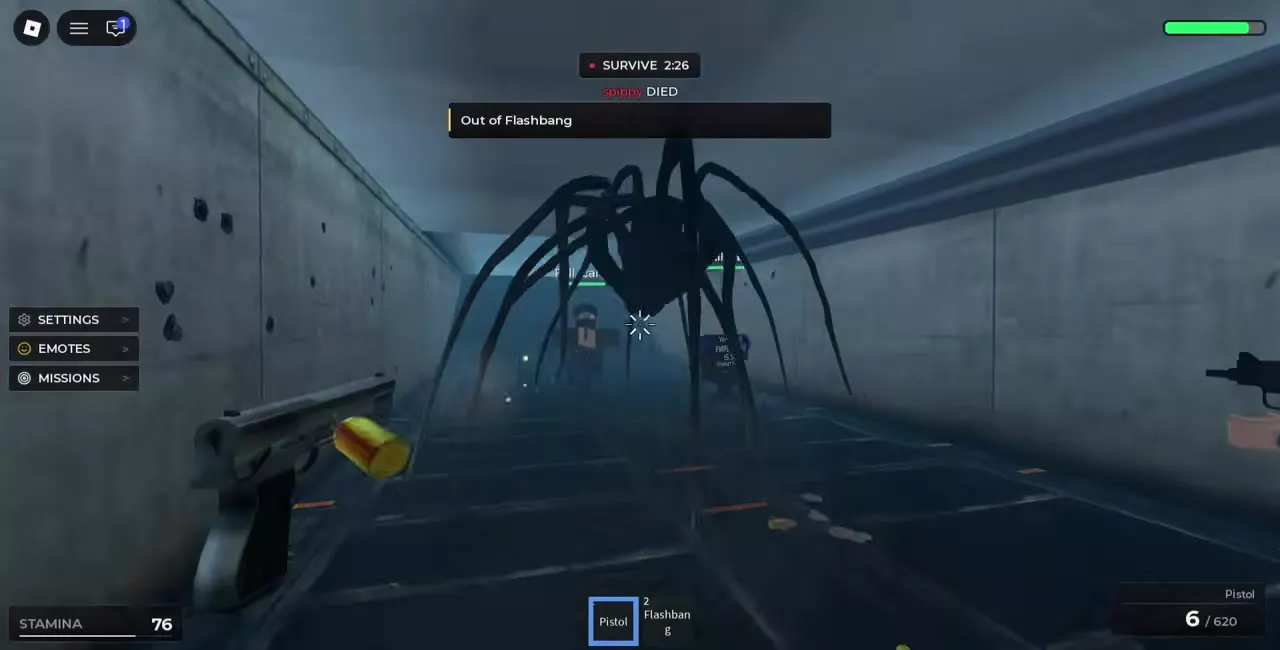
MedKit healing
- Buy a MedKit for 900 Coins in GEAR and assign it to a hotbar slot.
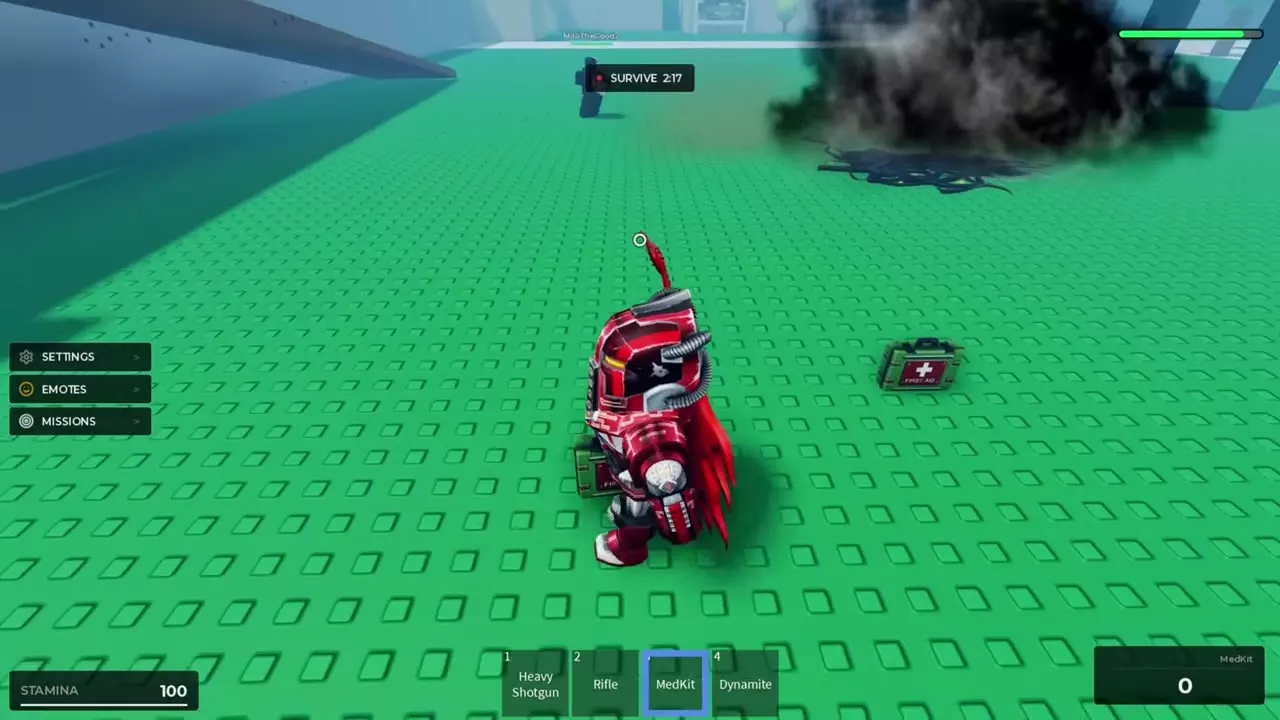
- When injured, select that slot and use a kit. Watch the health bar in the upper right and the remaining count in the lower right. Healing consumes one kit.
- If you see Out of MedKit, switch back to another usable item.
In one Crossroads round, using the last MedKit dropped the count from 1 to 0. A green first-aid box appeared nearby and the player’s health gradually returned to full.
Wear and replace Heavy Vest
Equip the vest
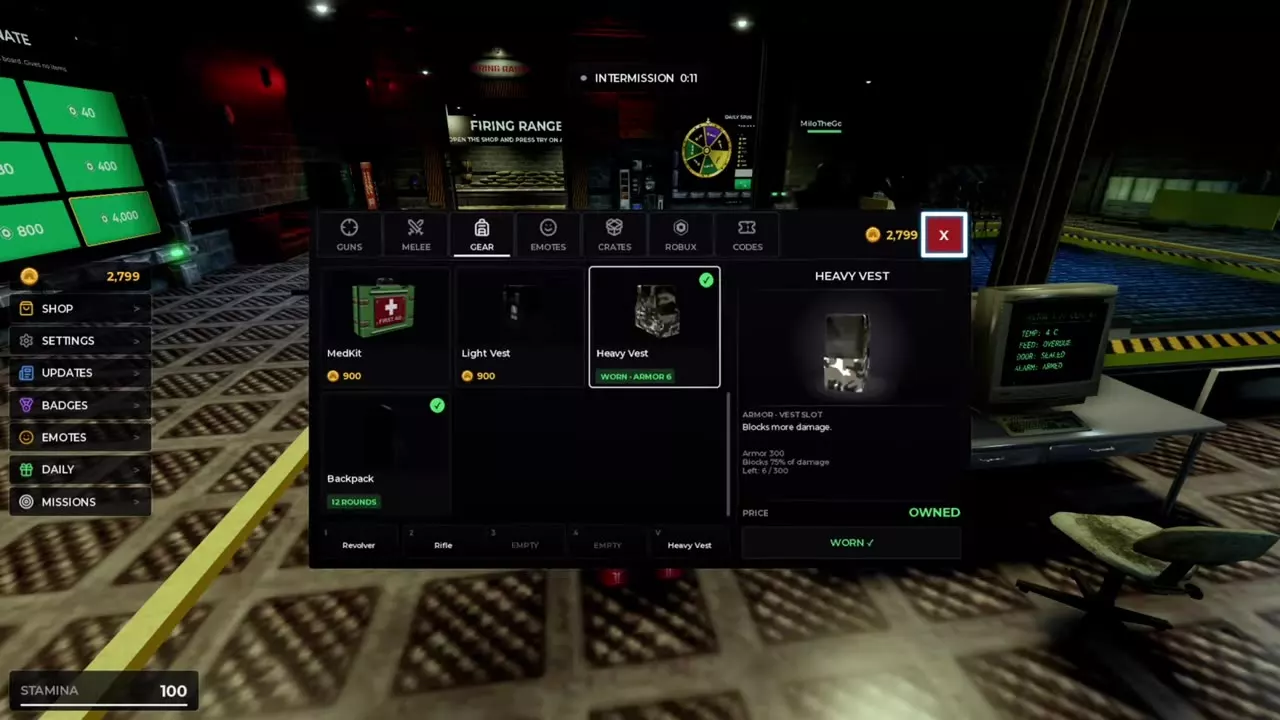
- Open SHOP → GEAR and scroll down to the vests. Select your owned Heavy Vest and press WEAR.
- Look for WORN on the vest card and Heavy Vest in the VEST SLOT at the bottom of the shop. Check the armor counter before the round starts.
A full Heavy Vest has 300 armor. It blocks 75% of incoming damage while worn with armor remaining. 6/300 means you have just 6 armor points left, even when the card shows WORN. GEAR also sells the Light Vest for 900 Coins.
Replace a broken vest
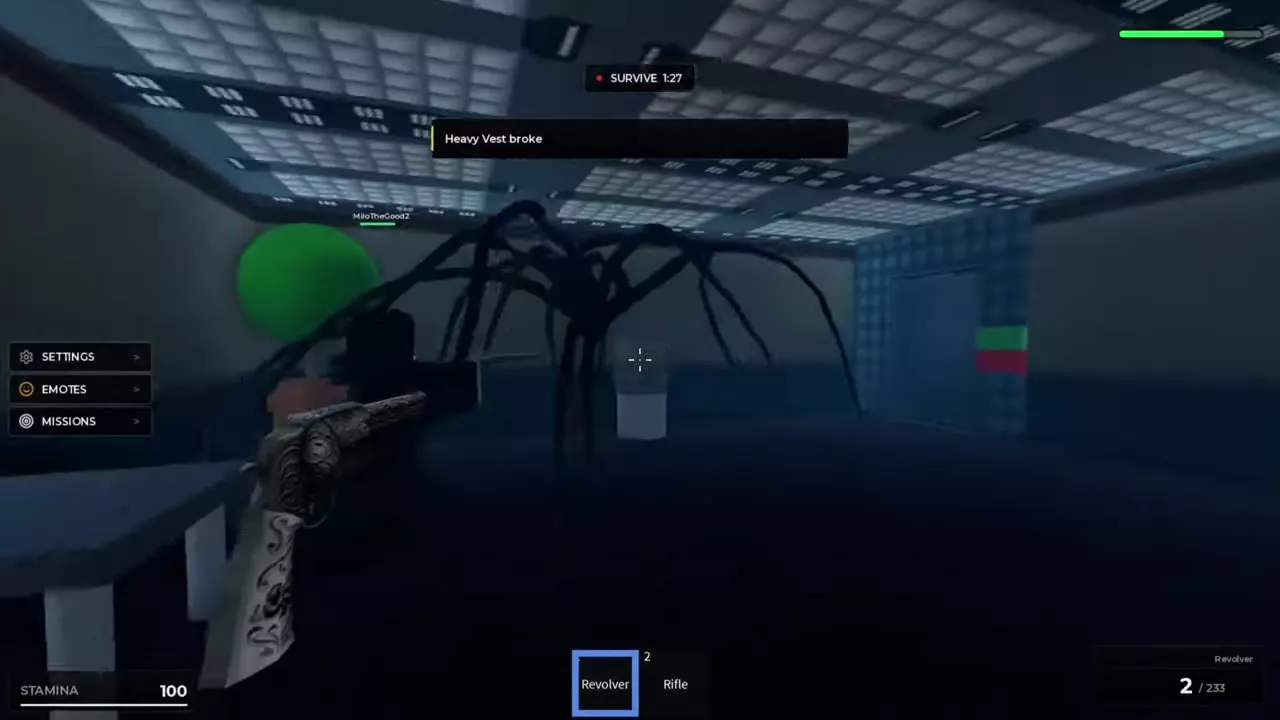
When Heavy Vest broke appears in combat, the vest’s protection is gone. Between rounds, return to GEAR and buy a replacement. Select the new vest, press WEAR, and confirm WORN and VEST SLOT again.
C4 and Dynamite remaining counts
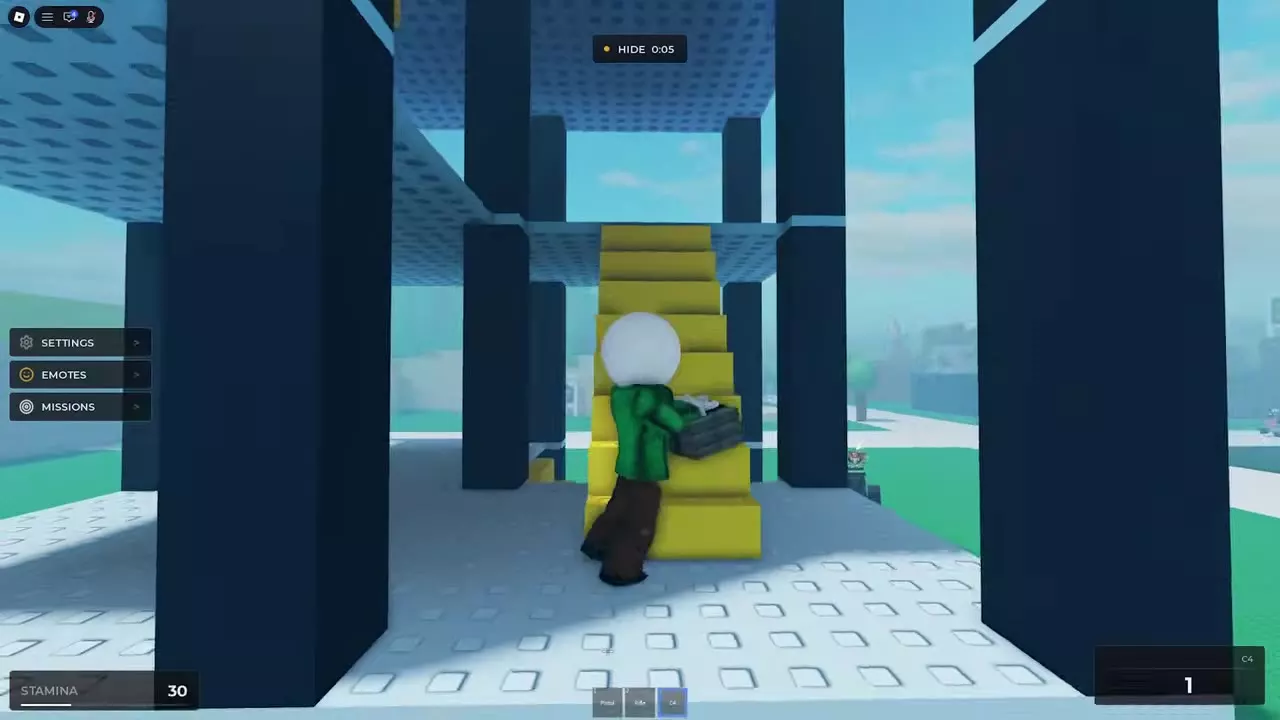
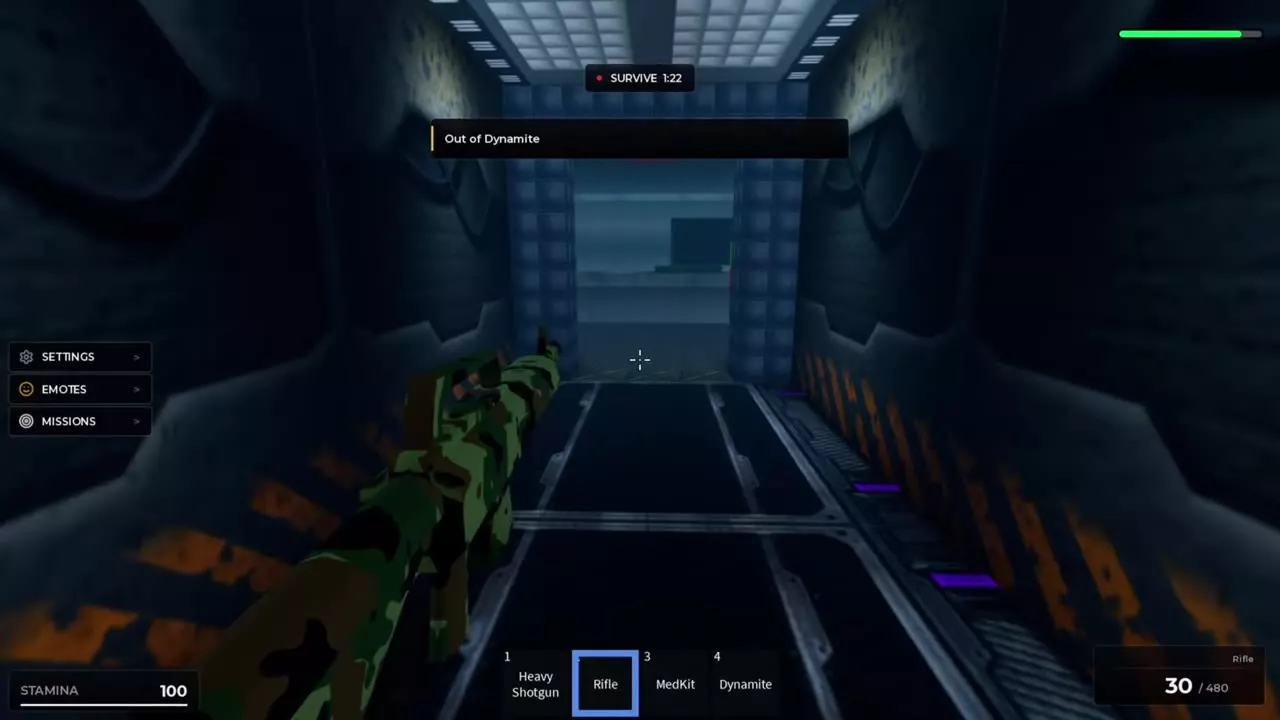
Select your equipped C4 or Dynamite during HIDE or SURVIVE to see how many you have left. Check the count before relying on an explosive as Crawlers approach. A count of 0 or the matching Out of C4 or Out of Dynamite message means you’ve run out. Switch to a usable weapon such as the Rifle.
If price decides what you bring, Grenade is the cheapest explosive at 450 Coins, followed by Landmine at 600 Coins, Dynamite at 750 Coins, and C4 at 800 Coins.
Gear prices and loadout choices
- Compare supplies, vests, and prices in the Gear and Armor directory.
- Match your weapons and supplies to your budget and available slots in the loadout guide.
- Find slot assignments, item switching, and reload controls in the equipment controls guide.